
Trick Photography and Special Effects Guide Review: Unleashing Your Photography Special Effects
The Trick Photography and Special Effects guide is a comprehensive instructional tool designed for photographers who wish to explore beyond the realms of traditional photography.
This guide is a treasure trove of knowledge, offering a wealth of expert advice and innovative techniques that will transform your photography skills and allow you to create breathtaking images.
The guide is for passionate photographers who believe that the art of using trick photography in photos should not be confined to those with expensive equipment or a degree in visual arts.
Sharboneau's guide is a testament to his belief, as it provides practical, easy-to-understand techniques that can be applied using a regular camera.
The guide is packed with 295 pages of detailed instructions, complemented by over 9 hours of how-to video tutorials. It also includes over 300 creative photographs from some of the most talented photographers worldwide, providing ample inspiration for readers.
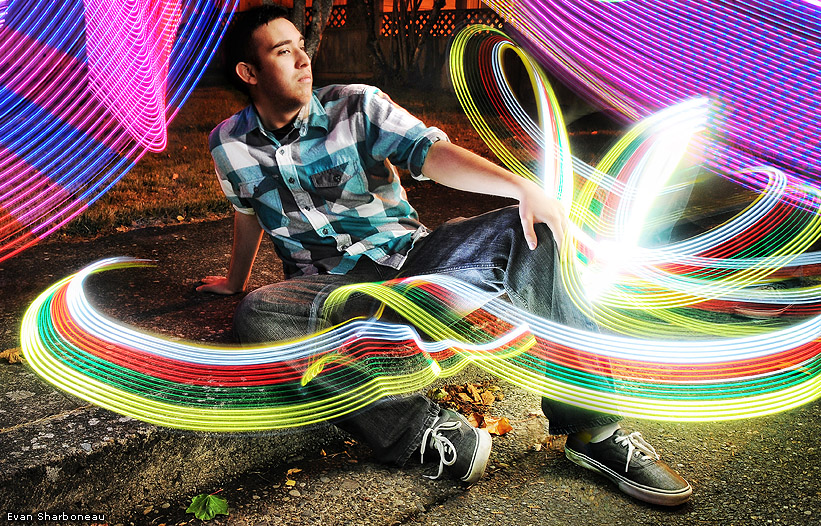
The guide covers a wide range of topics, from taking special effects shots and creating "light painting" images to improving your regular photography skills. It also delves into the technical aspects of photography, explaining how to tweak your camera settings to achieve the desired effects.
One of the standout features of this guide is its emphasis on practicality.
Sharboneau understands that not everyone has the luxury to invest in expensive equipment or software. Therefore, he provides alternatives and shows readers how to create stunning images using household items and basic entry-level DSLRs.

Canon EOS Rebel T7 DSLR Camera with 18-55mm Lens | Built-in Wi-Fi | 24.1 MP CMOS Sensor | DIGIC 4+ Image Processor and Full HD Videos
The guide also includes a section on how to use Adobe Photoshop or Adobe Photoshop Elements to enhance your photos and create visual effects that are out of this world. This is a valuable addition for those who want to explore the digital art aspect of photography.
As a bonus, the guide comes with a kit of mini-ebooks that provide tips and tricks on various aspects of photography, from understanding camera settings to marketing and selling your photographs for profit.
The Trick Photography and Special Effects guide is available for instant download at a reasonable price of $47. This one-time payment grants you lifetime access to the guide and all its future updates.
The guide also comes with a risk-free, 8-week money-back guarantee, making it a safe investment for those looking to enhance their photography skills.
In conclusion, the Trick Photography and Special Effects guide is a valuable resource for photographers of all levels.
Whether you're a beginner looking to improve your skills or a seasoned photographer seeking new techniques and inspiration, this guide has something to offer.
With its practical advice, easy-to-follow instructions, and affordable price, it's a worthwhile investment for anyone passionate about photography.

Mastering the Art of Special Effects Photography
Introduction
Special effects photography is not just a modern trend; it is an artistic technique that has been around for years. It involves using various methods and tools to create surreal and mesmerizing images. In this section, we will delve into the special effects photography definition, techniques, and how you can start creating your own stunning visuals.
Mastering Special Effects Photography: Your Complete Guide to Essential Techniques
Introduction
Special effects photography is an art form that transforms ordinary scenes into surreal and captivating visuals. In this updated guide, we'll explore key techniques like long exposure, double exposure, bokeh, and the intriguing realm of special effects still life photography.
Long Exposure Photography
Long exposure photography is a technique that captures the essence of motion in a single frame. It's perfect for creating ethereal landscapes, light trails, and silky-smooth waterfalls.
Tips for Long Exposure:
- Use a sturdy tripod to eliminate camera shake.
- Opt for a lower ISO setting to reduce noise.
- Choose a smaller aperture (higher f-stop number) for a deeper depth of field.
- Experiment with different shutter speeds to achieve the desired effect.
- Utilize a remote shutter release to avoid any blurring.
LONG EXPOSURE PHOTOGRAPHY VIDEO NOTES BELOW
I. Introduction
- Tim introduces himself and the location - a beach in Maui
- He wants to use the black lava rocks to create a smooth, fine art type seascape image
II. Problem: Not Enough Shutter Speed
- Middle of day, camera can't achieve a long enough exposure to smooth water
- Uses neutral density filters to decrease light entering camera
FAQ: What does Tim say is generally needed to achieve a long exposure shot that smooths out the water?
III. Setting Up the Shot
- Puts on 10-stop and 6-stop ND filters to get a long exposure
- Has to clean water droplets off filters
- Composes shot without filters so he can see, then locks down tripod
- Sets focus point 1/3 into frame
IV. Camera Settings
- Uses Nikon D80 in full manual mode
- Sets shutter to bulb mode for long exposures
- Uses f/16 aperture and ISO 64
- First test shot at 30 secs with 10-stop filter
FAQ: What is the lowest ISO setting that Tim uses for the long exposure shots?
V. Stacked Filter Attempt
- Tries 10-stop and 6-stop together, image comes out too dark
- Removes 6-stop, keeps 10-stop for 30 sec exposure
VI. Movement Shot
- Lowers tripod for wide angle view
- Uses ~0.5 sec shutter speed to blur water
VII. Conclusion/Wrap Up
- Mentions his Landscape Presets for processing photos
- Thanks viewers and farewell
FAQ: What does Tim recommend checking to get proper exposure with long shutter speeds?
The Trick Photography and Special Effects guide is available for instant download at a reasonable price of $47. This one-time payment grants you lifetime access to the guide and all its future updates.
Double Exposure Photography
Double exposure is a fascinating technique that superimposes two images into one frame. This can be achieved in-camera, through post-processing software, or even with traditional film.
Tips for Double Exposure:
- Choose complementary images for a harmonious blend.
- Keep your camera stable with a tripod.
- Use manual focus for precise sharpness.
- Skillfully blend the images in post-processing.
- Tweak the opacity and positioning of layers for a balanced composition.
DOUBLE EXPOSURE VIDEO NOTES BELOW
I. Introduction
- Teacher explains what a double exposure is - layering two photos together
- Goal is to practice this technique in Photoshop
II. Selecting the Images
- Background image from Google
- Foreground image is a model (Sara Bareilles)
FAQ: What two image types does the instructor recommend using for a double exposure?
III. Layering the Images
- Copies model layer into background layer
- Resizes model layer proportionally
- Duplicates background layer
IV. Creating the Effect
- Makes model layer invisible
- Uses Select Color Range on duplicate background
- Keeps model's face area selected to remain visible
- Adds layer mask to model layer based on selection
FAQ: What Photoshop tool allows you to select specific color ranges in the image?
V. Customizing the Double Exposure
- Can move model layer independently
- Adjusts blending, opacity, color, etc. of each layer
- Flips, rotates model layer for different effects
VI. Finalizing the Composite
- Merges layers when finished
- Crops image for printing
VII. Conclusion
- Notes original photos needed for final project
- Practice with any images for now
FAQ: What resolution should be used when printing the final double exposure image?
Bokeh Effects
Bokeh is the art of creating aesthetically pleasing blurred backgrounds, often achieved with wide-aperture lenses. You can even craft custom bokeh shapes using simple cutouts.
Tips for Creative Bokeh:
- Opt for lenses with wide maximum apertures.
- Use longer focal lengths to compress the background.
- Craft DIY bokeh shapes using black paper or cardstock.
- Carefully position your shapes to achieve the desired bokeh effect.
BOKEH EFFECTS TRICK PHOTOGRAPHY VIDEO NOTES BELOW
I. Introduction
- Sandy introduces herself and the 3 mediums she'll use to create bokeh backgrounds
II. Colored Pencil Bokeh
- Easiest method, uses powdered pencil in analogous colors
- Creates background layer with cotton ball
- Adds polka dots with kneaded eraser, further dots are brighter
- Softens dots into background with cotton ball
- Adds more layers of color and polka dots to build up effect
FAQ: What tool does Sandy use to create the colored powder for the pencil bokeh background?
III. Watercolor Bokeh
- More difficult, paint background around subject leaving white highlights
- Let colors blend into background around foreground image
- Add darker color while still wet to create contrast
- Lift out bokeh dots from wet pigment with baby wipe
- Let dry completely before painting foreground image
FAQ: Why does Sandy recommend leaving white highlights when painting the watercolor bokeh background?
IV. Copic Marker Bokeh
- Most difficult method, about blending markers for soft background
- Start with light colors and build up intensity
- Add complement color for contrast
- Use colorless blender to create polka dot effect
- Layer dots and colors to build up background
FAQ: What Copic marker does Sandy say is the "best friend" for creating the polka dot effect?
V. Conclusion
- Sandy encourages viewers to follow her on social media for more on bokeh
- Preview of Friday's more advanced bokeh video
FAQ: Where can you find Sandy next Friday for an advanced bokeh video?
The Trick Photography and Special Effects guide is available for instant download at a reasonable price of $47. This one-time payment grants you lifetime access to the guide and all its future updates.
Special Effects in Still Life Photography
Still life photography takes on an entirely new dimension when you incorporate special effects like light painting. Imagine light trails swirling around a glass of wine or illuminating a carefully arranged plate of food.
Creative Ideas for Special Effects Still Life:
- Use colored gels to add vibrant hues to your scene.
- Incorporate mirrors for unexpected reflections.
- Add elements like smoke or fog for added atmosphere.
- Experiment with lighting angles to create dynamic shadows.
STILL LIFE PHOTOGRAPHY VIDEO NOTES BELOW
I. Introduction
- Artist explains she will build and voiceover a still life composition
II. Setting Up the Still Life
- Starts with off-white paper background
- Adds origami paper for diagonal lines
- Overlaps objects to create bridges
- Tries different colored cups for focal point
FAQ: What does the artist say is the purpose of overlapping objects in the composition?
III. Exploring Options
- Tries miniature dogs as playful element
- Looks for horizontal shape to complement vertical vase
- Narrows down to simple composition of 4 objects
IV. Final Touches
- Adds red candies as stepping stones into scene
- Checks that composition forms a square
V. Photographing and Evaluating
- Shares still photos from different angles
- Decides against straight overhead view she worked from
- Settles on tighter crop with clear bridges
VI. Conclusion
- Notes she will likely paint the second to last photo
- Final tips on keeping whites clean
FAQ: How does viewing the arrangement from different angles help the artist evaluate the composition?
Pioneers of Special Effects Photography
Special effects photography has a rich history, with several photographers making significant contributions to this art form. Here are three notable photographers who have left an indelible mark on the world of special effects photography:
- Jerry Uelsmann: Jerry Uelsmann is a master of photomontage. His surreal, dreamlike images were groundbreaking in the pre-digital era. Uelsmann?s darkroom skills were unparalleled; he could combine multiple negatives to create complex and seamless images that challenged the viewer?s perception of reality. His work has been exhibited in museums worldwide, solidifying his place as a pioneer in special effects photography.
- Man Ray: Man Ray was an American visual artist who spent most of his career in France. He was a significant contributor to the Dada and Surrealist movements. Man Ray is renowned for his ?rayographs,? a technique he developed which involved placing objects directly onto photosensitive paper and then exposing it to light. This process, also known as photograms, created unique and abstract images without the use of a camera.
For more in-depth information about Man Ray, his life, and his groundbreaking contributions to both the art and photography worlds, visit his profile on WikiArt. This comprehensive resource provides a detailed biography of Man Ray, along with a gallery of some of his most iconic works. Explore the mind and artistry of this legendary figure by visiting the following link: Man Ray on WikiArt.
- Angus McBean: A British photographer, Angus McBean is best known for his surrealist portraits of celebrities, particularly those in the entertainment industry. McBean?s work often involved manipulating the photographic process to create fantastical and whimsical images. One of his most famous techniques was to superimpose a subject?s face onto different objects or scenes, creating a playful and surreal portrait.
These photographers were true innovators, pushing the boundaries of what was possible with photography and paving the way for future generations of artists. Their work continues to inspire photographers and special effects enthusiasts around the world.
The Trick Photography and Special Effects guide is available for instant download at a reasonable price of $47. This one-time payment grants you lifetime access to the guide and all its future updates.
? Unleash the Power of Your Camera with These Jaw-Dropping Hacks! ?
1. Top 10 Lighting and Effects Tricks
This section focuses on the top 10 lighting and effects tricks creative ways to manipulate and play with lighting, one of the most important elements in photography.
- Use a Tea Strainer For Dramatic Lighting or Bokeh
- Use Reflective Paper For Product Photography
- Create Your Own Lightbox
- Create a Bokeh Effect With Tin Foil
- Use A Treadmill, Model Car & Spray Bottle For This Awesome Effect
- Use A Backyard Pool To Simulate A Country Pond
- Turn A Beer Helmet Into A Reflector Rig
- If The Weather Won?t Cooperate, Create Your Own
- Shoot Through A Burning Newspaper
- Hide A Light Behind Your Subjects To Illuminate Water Droplets
2. Innovative Props and Backdrops
This section is about the top 10 ways to use innovative props and backdrops creatively using everyday items in to create your photos.
- Use a Laptop Or Computer Monitor to Create Stunning Backdrops
- Fill An Umbrella With Autumn Leaves
- Drop Pages Of Text Or Sheet Music In The Foreground
- Use A Glass Coffee Table To Create An Interesting Frame
- Use Tinsel or Metallic Streamers to Frame a Headshot
- Use a Shop Window And a Couple Of Friends To Create Unique Look
- Create Dynamic Backdrops With Household Items
- Turn A Tasty Treat Into A Fun Prop
- Shoot Through A Dirty Garden Pot For A Fun Look
- Bury Picture Frames In The Sand To Frame A Beach Portrait
3. DIY Hacks and Tools
This section is about crafting your tools and solutions for photography.
- Create Your Own Simple Lightbox With a Window and Sheet of Paper
- Turn Ordinary Candy Into A Work Of Art
- Create This DIY Camera Raincoat
- Use A Light Boom Or Long Pole To Get A Great Top-Down Shot
- Hold Up A Fake Rope Swing And Use Photoshop To Make It Real
- Make Your Own Simple Flash Diffuser
- Create A DIY Windblown Look With A Hairdryer On Your Next Model Shoot
- Build a DIY Lighting Softbox Out Of Household Objects
- Turn Discarded Clothes Into An Anti-Shake Camera Support
- Turn Your Smartphone Into A Pinhole Camera In Seconds
4. Dynamic Composition Techniques
This section focuses on unique angles, perspectives, and methods to create outstanding compositions.
- Dangle Over A Ledge To Capture A Dramatic Angle
- Get Down Low For A Stunning Pregnancy Shot
- Climb A Tree To Replicate That Iconic ?American Beauty? Moment
- Place Your Subject In A Shallow Pond For Amazing Results
- Use A Chain To Create Dramatic Lines In Your Moody Images
- Use A Plastic Toy Slinky To Turn A Simple Portrait Into A Masterpiece
- Turn A Book And Some Alphabet Pasta Into A Story Of Its Own
- Add Drama To A Moody Image With Vape Smoke
- Turn A Bamboo Basket Into A Strong Photo Element
- Use A Plastic Bottle And A Chair To Create Dramatic Images
5. Post-Processing and Digital Enhancements
This section is about enhancing photos after they're taken using digital tools.
- Use Photoshop To Create A Fun Wedding Image
- Use Photoshop To Add Drama To A Couples Shoot
- Use Photoshop To Create A Stunning Baby Photo
- Use Photoshop To Remove Unwanted Tourists From Your Best Images
- Achieve Fun Top-Down Shots By Taping Your Phone To The Ceiling
- Create Fun Visual Effects With Forced Perspective
- Light and Spin some Steel Wool for some Incredible Slow Shutter Shots
- Make a Kirilian Photography Machine for some Ethereal Effects
- Make a DIY Projector to Enhance your Portraits
- Use Photoshop to create dream-like landscape images
CTA: Looking to turn these tricks into a successful digital marketing career? Dive into our comprehensive guide on how to start a successful digital marketing career in 2023 and master the art of using photography in the digital realm!
Conclusion
Special effects photography is a broad and exciting field, offering endless opportunities for creativity. Whether you are a beginner looking to explore in-camera special effects photography or a seasoned pro interested in advanced techniques, there is something in this realm for every photographer.
The Trick Photography and Special Effects guide is available for instant download at a reasonable price of $47. This one-time payment grants you lifetime access to the guide and all its future updates.